All You Need to Know About Swapping a 20v by System
By mr220v
Changes that need to be made to accommodate the 20v by system
1. Exhaust
-Silvertop
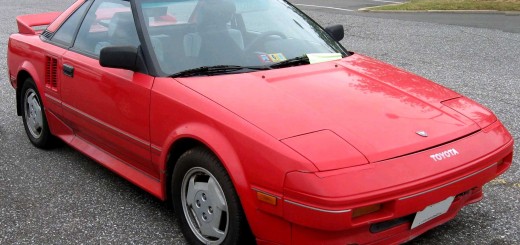
The complete 16v exhaust system can be used with the 20v silvertop. The only needed modification will be to the outermost flanges of the stock 16v header (pictures are of an ae86 header, but the bolt patern is the same)


The 20v header can also be used, but will require either a custom bpipe, or modifications to an existing 20v bpipe. The 20v silvertop header also has clearance issues with any exhaust side mounted starter. Clearance between the ST header and starter will only be a few millimeters.
The diameter of the 20v header pipes is identical to those on the 16v. The 20v header may have a slight advantage due to the use of theta plates, but dimensionally, the headers are the same or similar.
-Blacktop
The 16v header can also be used with the blacktop, but will result in power loss due to the Blacktop’s larger exhaust ports. A typical 16v header/manifold will be a bit constricting. 16v manifolds have been used with blacktops, so it is possible. Larger diameter 16v headers may be available.
For best results, use the blacktop header (or exhaust header that has the same exhaust port dimensions) when possible.
The exhaust mounted starter will not clear the larger diameter blacktop header. This will be an issue with any 1985-1987.5 20v conversions where the original c50 transmission is to be used since these transmissions lack the intake side mounting position. You really have 3 options in this situation.
a. Use the 16v setup, and take the performance hit
b. Use a later c52 transmission (or bellhousing) that does have the intake starter mounting position
c. Modify the 20v header to clear the starter.
Once again, a custom bpipe will have to be made, or an existing bpipe modified
Keep in mind that 87+ mr2’s used a larger diameter bpipe, cat, and muffler, so this is your best choice for the 20v. The 4agze equipped mr2’s used the same exhaust setup as the NA cars did.
2. Transmission
All mk1 mr2 transmission will physically bolt up to the 4age 20v. There are considerations you must make though.
-A series motors used 2 different sizes of flywheel. Early mr2’s, up till around 1986, used a 200mm flywheel. From 86 on, a 212mm flywheel was used. (200mm and 212mm pertains to the griping area of the flywheel. The actual diameter of the flywheels was the same). The 20v came with the later size flywheel, so when ordering a replacement clutch and pressureplate, just ask for a clutch kit for a 1989 mr2. If using the smaller flywheel, ask for a set from an 85 mr2. Either clutch set will be sufficient for the stock 4age 20v.
-Early c50 transmissions only had one mounting position for the starter. With this transmission, you are limited to mounting the starter on the exhaust side of the motor. These transmissions are on the 85-87.5 mr2’s. Later mr2’s had the c52 transmission. This transmission had a secondary starter mounting position on the intake side of the motor, just like the stock 20v transmissions. If you plan on using your 16v exhaust manifold, which is perfectly fine with a silvertop, you can mount the starter on either side. If you plan on using a 20v header, especially the blacktop’s, the header will not clear the exhaust mounted starter. If you must use the exhaust mounted starter in this case, the header will have to be modified for clearance.
-The c52 and c56 that comes with a 20v can also be used with modification and transferring a few parts from the original mr2 transmission, namely your mr2 selector shaft, and the entire mr2 shifter assembly. On the silvertop c52, a hole will have to be drilled for the selector shaft and the oil seal. On the C56 however, there is no casting for the oil seal. One of 3 approaches has to be taken.
-Add the additional aluminum casting, and drill as you normally would
-Fab an adapter or a makeshift casting (this has been done with JB weld, not the ideal way, but seems to be holding up in this case)
-Reuse the center transmission casing from your original mr2 transmission. This requires taking both transmissions apart
Here are some pics of the problem area:


-6speed transmissions are available for the 20v, known as the c60. Some blacktops came with a 6speed stock, although it was not a real common option. The same considerations must be made for the oil seal casting that have to be made when using a blacktop c56 5 speed. Getting a blacktop with a 6speed is usually somewhat pricey.
One other option is to use a 00+ Celica 6speed. The bellhousings are different, but can be swapped somewhat easily. All that holds the bellhousing to the central casing are the external 12mm bolts, and two 12mm bolts on the inside of the bellhousing that are attached to a reverse lockout arm. Once the external bolts are removed, the internal ones can be removed and installed through the 1-2 inch resulting gap. It’s a little bit tricky, but is much easier than taking the transmission apart. Once apart, remove the old differential bearing races and shims from the 4age bellhousing and replace them with the ones from the original 6speed bellhousing. It is very important that the differential stay with all of its original races and shims. This is the only way to keep the tension on the differential somewhat within spec. Too much or too little tension, and you will burn your differential bearings.
The celica 6speed will also require the use of 1991+ mr2 NA axles. No drilling is required since the Celica’s selector shaft is already on the correct side of the motor. Just add the mr2 selector shaft and shift assembly.
3. Cooling
The 20v does require hoses to be run differently. It is very straight forward, and one of the easiest parts of the swap. Rather than draw up a detailed explanation, here are some detailed pictures:

The rule of thumb that I use is link the driver’s side hard line that runs under the center of the car to the driver’s side water outlet on the 20v motor. Same for the passenger side. The passenger side hardline (the one with the oil cooler) goes to the water inlet on the back of the head next to the exhaust manifold. I usually try to incorporate my filler neck into this side of the cooling system. The needed hose stock can be purchased at Napa along with any flexible hoses you might want to use.
The heater hoses are also very straight forward. The 16v hoses can be used, but it is better just to buy the correct diameter tubing, and simply cut new hoses to length.
4. Throttle cable
My preferred method for dealing with the 16v cable being too short for the 20v is to simply reroute it. I drill a second hole in the fire wall about 6inches to the passenger side of the original throttle cable hole (be careful not to hit anything under the dash when you do this). I then route the cable under the dash, under the center console, behind the rear firewall and out the trunk release cable hole in the rear firewall (if you want to keep your trunk release, a second hole can be drilled). This puts the throttle cable in the perfect position with more than enough length.
5. Wiring
This is the heart of this conversion. Many 20v swaps have failed due to installers being unable to master the wiring. To make this part of the swap go more smoothly, I offer a complete plug and play solution. Here is a picture of the finished product:

It is perfectly fitted for the aw11. The air conditioning works along with the enginebay cooling fan. The 20v ecu will mount in the stock aw11 location. I test every harness on my own vehicle so that it is know to be operational and defect free before I ship it. The harness is loomed and ready to run.
The whole concept is to offer a harness that looks and fits like it was oem. Its as if you went to the Toyota dealership and ordered a stock harness, although my harness is cheaper than a dealership replacement harness. The cost is $350 and has a 100% success rate.
It’s a superior product compared to other offerings on the internet that claim to be plug and play. Competitive offerings ship mostly unloomed (ie you get a barewire harness), totally untested and have been known to contain defects. You as the end user get to sort through all the issues. Far from a hook it up in 20 minutes and turn the key proposition.
If you decide to do the wiring yourself, it is best to get an uncut 20v harness. There will be plenty to modify and change to make it work with the aw11 bodyharness, but is much easier than trying to get a cut harness to work. With a typical cut harness, you end up reconstructing a good portion of the harness. Not good if you are not pretty advanced at automotive wiring. Either way, there is a lot of soldering involved.
Here is a link to a good step by step on how to get an uncut 20v harness to work in the aw11.
http://www.padandwheels.com/mr2/blac…ng/wiring.html
Swapping a 20v 4age for a 16v 4age has become a very common practice. Aside from significant performance advantages, you will be getting a newer engine typically with much lower mileage. Parts availability for the 20v has improved over the years as well. There are a number of Toyota dealerships that specialize in JDM parts. Champion Toyota comes to mind. Almost all the parts can be purchased easily and are priced like normal USDM dealership replacement parts. Considering many mr2 replacement parts have to be ordered anyway, getting 20v parts is not much more of a hassle.
The 20v conversion is a fairly easy bolt-in swap. Perfect for those looking for a high revving engine with a wonderfully broad powerband who also want stock reliability.
View the original content on International MR2 Owners Club


