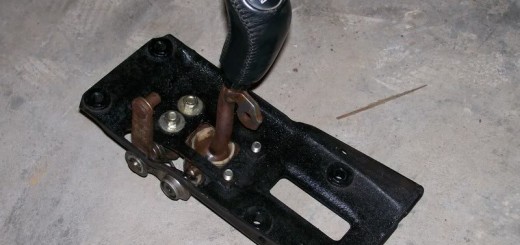
These are just some notes on installing the stock turbocharger back into the MR2. I start out by loosely bolting the turbo oil pipe to the turbocharger (two 10mm bolts). The dump pipe (downpipe) is not installed. If the turbocharger stay bracket was removed, I would leave it off, and install it later, but if it was never removed just leave it as is.

Place the turbocharger gently into the engine compartment under where the exhaust manifold installs.

I then very loosely bolt the exhaust manifold to the head.

Then bolt the turbocharger to the exhaust manifold. I tighten the bolts using a 14mm closed end wrench, but since the bolts have to be torqued to around 47ft-lbs, it is sort of a guessing game. I use another 15mm wrench and connect the two (open end of 14mm into closed end of 15mm) to get more leverage.


If the turbocharger stay was removed, now is the time to install it. The bolt to the turbocharger can be tightened (think it’s 51ft-lb).

Attach the upper 12mm bolt very loosely to the block, to make sure that the holes line up.

Since the exhaust manifold is very loosely installed, and the turbocharger stay is loosely installed, it can be slightly moved around so as to get enough clearance to install the dump pipe. You might want to remove the 12mm bolt from the above picture to add just a touch more ‘mobility’ to the turbocharger. Installing the dump pipe at this point involves some wiggling, but it will eventually go onto the studs.

With the dump pipe still loose, go back underneath and install the upper 12mm bolt to the turbocharger stay.

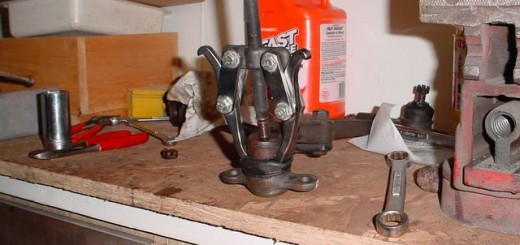
The dump pipe can then be torqued to the turbocharger. Four of the six bolts can be easily gotten to with a standard socket wrench and torque wrench. The bolt closest to the oil cooler (where the oil filter attaches), is tightened with a closed end wrench. The lowest bolt can be gotten to using a universal swivel joint socket. The swivel socket is shown in the following picture.
 The wrench combination used to tighten the bolt closest to the oil cooler:
The exhaust manifold can now be tightened and torqued to specification. First picture shows the stud which was repaired using time inserts.


Back underneath, the turbocharger stay can now be bolted to the block. Again the torque here has to be guesstimated since an open end wrench is used for the top bolt. Do not make the mistake I did (2nd picture) where the catalytic converter interfered with the dump pipe stud. I had to remove the bracket, and re-install it.


Next up is the turbocharger oil bolt (union).

There are two washers that need to be replaced with this bolt. One goes on top of the pipe connection and the other underneath. The one that goes on top, can just be placed onto the bolt, but the one that goes underneath the pipe must be placed there first. I used a magnet and screwdriver to put the washer into place. The bolt is tightened with a 27mm socket and a combination of swivel joint and extention(s).

Next up is the catalytic converter. Attach the converter to the dump pipe via the three bolts and and two nuts, loosely. The right hand (driver’s side) bracket can then be attached to the converter with the single 14mm bolt. Once this bolt is in place, the one bolt that was loosened or removed during removal (that holds the bracket in place) can be tightened.

For the left bracket (passenger side), we go back up top to tighten the two 12mm bolts that hold the bracket to the block. Here, I use a swivel socket to reach the bolts.

Back underneath, the left side (passenger side) bracket bolts to the converter (14mm) can be installed.

Next up is the motor mount. The bracket with two bolt holes is installed first.

Then the next bracket with four bolt holes, and the through bolt (torqued to 71ft-lbs), is installed.

Next up is the dump pipe heat shield and O2 sensor.


Then the turbo heat shield – and in my case also the EGT probes.

The clutch bolts that were loosened so that the motor mount could be easily removed are now tightened – spec is a small 9ft-lbs.

The turbo water pipe can now be installed. I use a swivel joint and 10mm socket to install the two bolts to the turbocharger (along with a new gasket). The 12mm bolt attaches to the turbocharger close to the turbo inlet.

The water hoses can now be attached, along with the turbo air hoses to the actuator. I use hose clamps from Home Depot.

Once that’s done, install all the air hoses, side panels, and strut brace, and go do some big smokey turbo burnouts!


This documentation in no way replaces the Toyota MR2 Repair Manuals. The purpose of this content is only to provide supplementary information to fellow MR2 enthusiasts. Midship Runabout and its contributing authors will not be held responsible for any injury or damages that may occur as the result of practicing any of the methods or procedures described within this website. Article and photo submissions are property of the contributing author.

Thanks for sharing your thoughts. I truly appreciate your efforts and I am waiting for
your further write ups thank you once again.