How To: Install Rear Swaybar
Welcome back to the SE garage, where our mistakes become your after-dinner conversation.
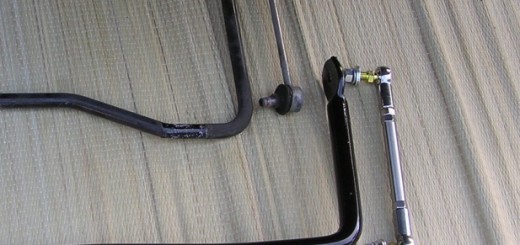
Rear swaybar installation parts list:
1. Addco 7/8 swaybar
2. 2sRus High and Tight rear endlinks
[…]
Toyota MR2 Community Archive
Welcome back to the SE garage, where our mistakes become your after-dinner conversation.
Rear swaybar installation parts list:
1. Addco 7/8 swaybar
2. 2sRus High and Tight rear endlinks
[…]
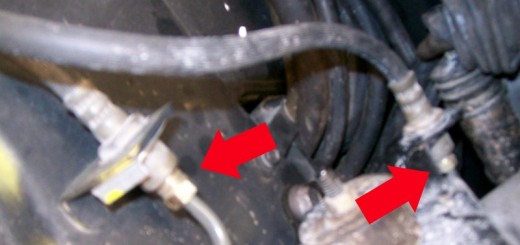
Changing The Clutch Line
Tools:
10mm Line Wrench
12mm Line Wrench
Regular Pliers
Lift or Jack/Jack Stands
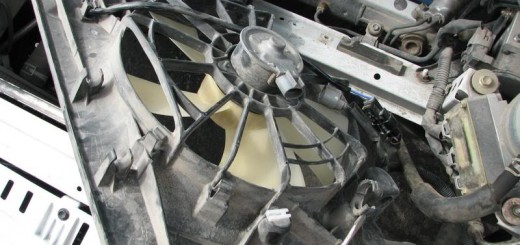
First off I’ll talk a little about how I “determined” my motor was bad. I was poking around in the frunk when the fans came on and I looked down to see that only...
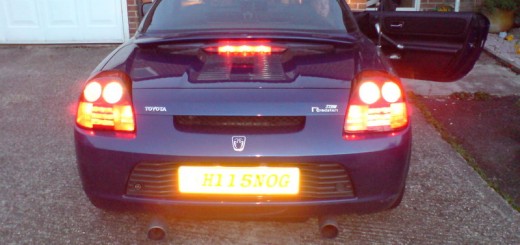
The dilemma, new funky rear 03 lights with old non funky 00 wiring harness. New harnesses from MrT £45 The issue is that 3 of the lights are push fit and will move to...
I wrote this up last year and just joined this board not too long ago so I wanted to share this with you guys. Well a lot of people have been asking how to...
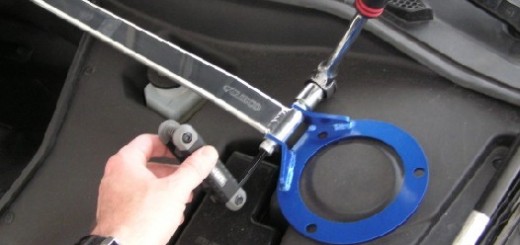
First of all a disclaimer- I am not a professional, merely an ungifted amateur. This guide is simply how I installed my shifting cable bushings and I accept no responsibility for any damage or...

First of all a disclaimer- I am not a professional, merely an ungifted amateur. This guide is simply how I installed my Netz style bar and I accept no responsibility for any damage or...
Welcome back to the SE Garage, where there ain’t no party like a supermod party ’cause ahttp://midshiprun.wpengine.com/wp-admin/post.php?action=edit&post=1340 supermod party don’t stop! Today we’ll answer the age-old question: Can you be too braced up? Let’s...
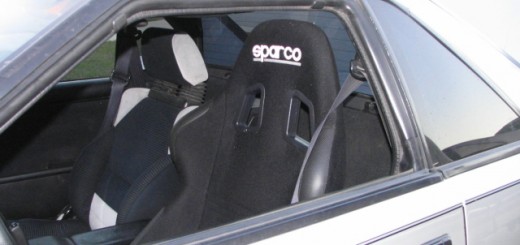
ere’s a write-up that I’ve been meaning to get to for a while now. Every car has different seat mounting locations. Therefore aftermarket seat manufacturers must sell brackets specific to the car. Sometimes this...
After getting tired of looking at the old dull headliner and dirty sunvisors for the past 10 years, I decided to try out the Vinyl & Fabric paint/dye. You can purchase this at your...